Monday
Was not here
Tuesday
Today i did the dimensions and centre lines of the adaptor. I learned how to properly set centre lines and use the apporpiate line types such as hidden lines, continuous lines, and dashed lines. I also posted my drawings on my blog.
Wednesday
Today i worked continued to use autoCAD on my next drawing. I started the new drawing of CAD problem 1.4. It was a little harder than the others but i managed to figure it all out. Less lines were given specific distances and i was forced to use a lot of other liens ot figure the smaller ones out.
Thursday
Today i finished all the different views of CAD problem 1.4. I learned how to make better use of angles and distances effectively when drawing my shapes. I also started to do the dimensions of the drawing.
Friday
Today i finished the dimensions and centre lines and posted it on my blog. I learned how to scale down my drawings when posted on the model paper. I learned how to professionaly post the name of the drawing, my name, and the name of my school.
Friday, April 30, 2010
Wednesday, April 28, 2010
Tuesday, April 27, 2010
MECHANICAL DRAWING
Dimensions:
are the text that is provided with a drawing that describe the exact size and location for the features shown. also known as size descriptions.
Conversions:
1 in. = 2.54 cm
2 methods of dimensios
aligned and unit directional
do not place dimensions on object
do not place dimensions on hidden lines.
leaders should not be vertical or horizontal only at 30-60*
Thursday, April 22, 2010
Tuesday, April 20, 2010
Monday, April 19, 2010
Week 10
Monday
Today i worked on drawing the centre lines by using another layer that was green with dashed lines. I drew the lines over the centres of each circle across to the other side of the fancy shape. I then put dimensions on the fancy shape and made the precission 0.00 for 2 decimal places :). Then i was finished and was happy about my thing i made.
Tuesday
Today i placed the gasket drawing onto the appropriate paper that is used for showing the design's we made. I added my name, school, and title of the project. I saved the picture and posted to my blog. I learned how to size the design down so that it could fit to the paper.
Wednesday
Today i did all the quizes that we were assigned from the various chapters. I answered the questions and took a print screen of the results. I then saved them on paint and added them to seperate folders. I learned a few new things about CAD that i never knew.
Thursday
Was not here
Friday
Today i worked on my Adaptor drawing in CAD. I used trim to make most of the lines in proper position. I also drew the circles using radius and diameter. I finished all the different views of the drawing.
Tuesday, April 13, 2010
House Project
Summary of room Location
James Bolton
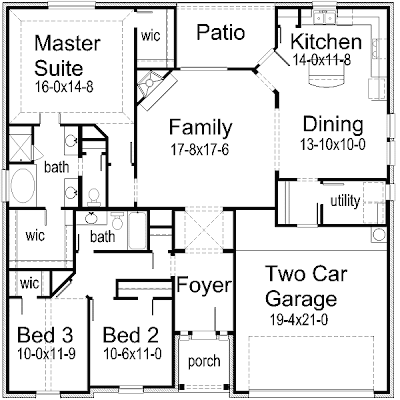
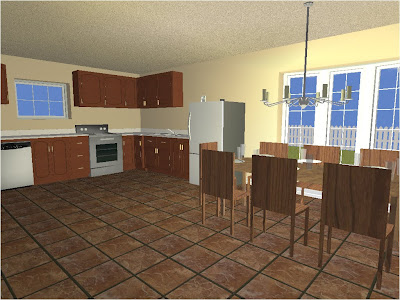
The layout for my house design that I have chosen is 1892 Square feet. I chose this house design because it fits the requirements for our house design very well. All the bedrooms are located close to each other with only a bathroom separating the main bedroom from the first bedroom. The first bedroom and second bedroom are located right next to each other for easy access and planning. The Family room is located in the very center of the living space which makes it easy to get to from any other area in the house. The family room opens to dining room and kitchen located in the farthest right hand corner of the house design. Just off of the dining room and kitchen is the laundry room which also opens up to a two car garage which allows for a second door into the house. Other doors in the house include the front door which opens up into the foyer, as well as the back door which is connected to the family room. There are two bathrooms in this house. One bathroom is located in the master bedroom while the other is located just outside of the other two bedrooms. There are also several walk in closets in the master bedroom as well as one of the smaller bedrooms. Coming off the back of the house is a deck which can be accessed through the door in the living room.
Room
Dimensions
Area
Kitchen/Dining Room
14-0 X 11-8
163 ft2
Family Room
17-8 X 17- 6
309 ft2
Master Suite
16-0 X 14 - 8
235 ft2
Bathroom # 1
14-0 X 9-0
126 ft2
Walk in Closet
9-0 X 8-0
72 ft2
Bedroom # 1
10-0 X 11-9
117 ft2
Bedroom # 2
10-0 X 11-6
115 ft2
Foyer
7-0 X 16-0
272 ft2
Laundry room
12-0 X 5-0
60 ft2
Garage
19-4 X 21-0
406 ft


Week 9
Monday
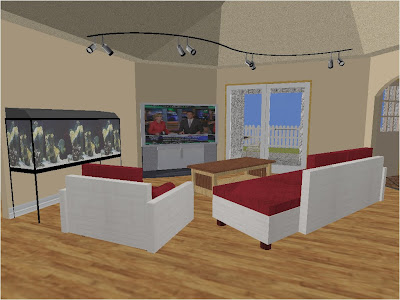
Today i worked on making the back porch. I made it an open patio with some lawn furniture on it . I also added a jungle gymmmeee. Next i made certain rooms in the house have cathedral ceilings (the Living room). I also made a fence around the house. I then took some pictures of the house for my blog.
Tuesday
Today i worked on my animation. I finished the animation and began to render it. I also changed a few small details on my house as well as adding a fence that went around the entire house. I learned a little more about the landscape and the terrain features
Wednesday
Today i made a microsoft word document that showed a table of all the room sizes in the house. It displays the dimensions of each room and the total square feet of the room. I learned how to get an exact square footage of each room while doing this.
Thursday
Today i started my design in CAD. We were assigned an assignement to do. The assignement required lots of circles aswell as triming to create the fancy shape. I learned how to use the ttr command and how to use circles effectively in CAD.
Thursday, April 8, 2010
Week 8
Tuesday
Today I worked on placing furniture in my house. I learned how to use the collision tool in order to change where i wanted the furniture to be placed. I also learned how to use the elevation tool in order to set things at a certain height that i wanted. I changed the texture and colour of certain furniture peices in my house as well.
Wednesday
ABSENT
Thursday
Today i continued to place the furniture throughout the house. I changed the flooring in the house as well as the cieling colour. I changed colours of certain furniture peices and re-adjusted the window sizes so that it would be proportionate to the rest of the house.
Friday
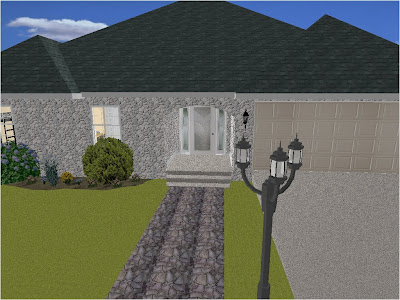
Today i worked on the roof. I put the roof over the house, but since it was just one giant square i had to make it have some shape. I learned to make peaks in the roof as well as different roof points higher than others above windows and certain rooms mainly near the front of the house. I made my front patio have stone around it with a concrete floor
Subscribe to:
Comments (Atom)


